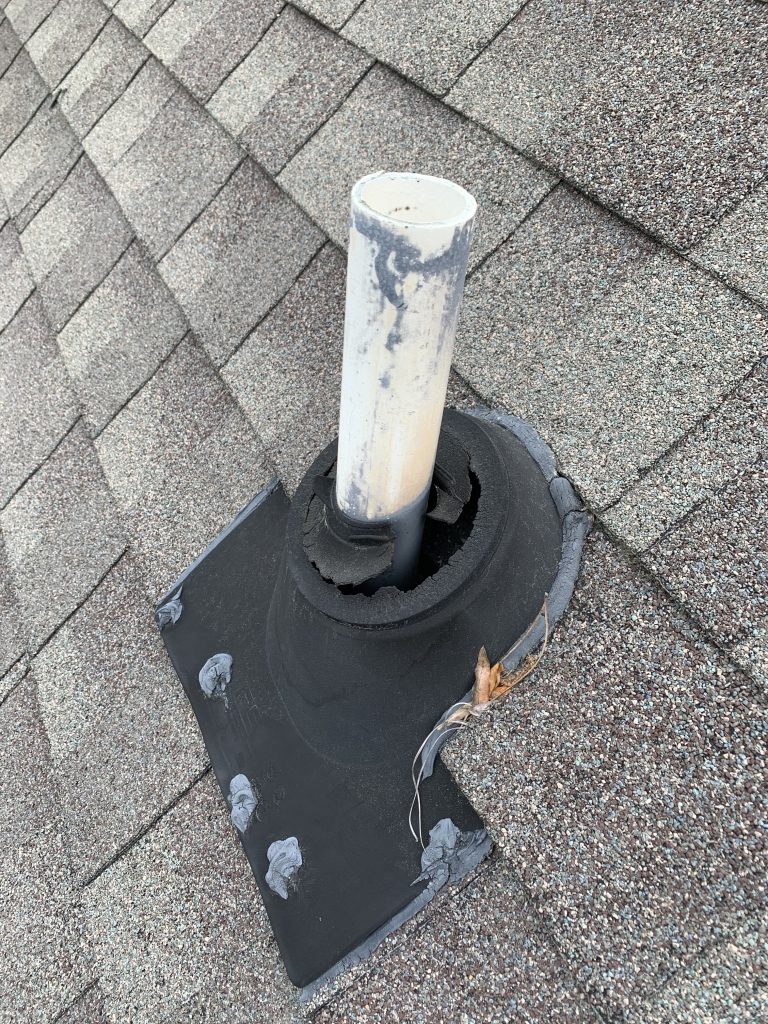
One of the more difficult types of vents to repair on your roof is the plumbing vent. To add frustration it is also one of the most common components on the roof to deteriorate and cause leaks. The reason for this is that most roofs that were installed in the past used a metal or plastic base with a flange that would fit around the base of the pipe. This often created issues years down the line when the flange would wear out (particularly in the Austin, Texas heat!) and create a small opening around the perimeter of the pipe. In recent years, there have been developments in this technology that address this issue like Bullet Boots which wrap around the entirety of the pipe, but the vast majority of roofs currently installed do not feature this product, leaving most homeowners susceptible to this issue.
The primary difficulty with conducting a roof repair on a plumbing vent is navigating in limited space due to the protrusion of the plumbing vent above the roof field and the limitations that imposes when considering the different angles between the pipe and the shingles in conjunction with the roof deck. Let’s start with the material inventory you will need and then get into the steps to clean the area to conduct a proper roofer repair.
Materials
You will need to gather the following to conduct a proper roof repair when dealing with a plumbing vent issue. All of these materials can either typically be found at Home Depot or at your local building or roofing supply company.
- A bundle of shingles that matches the color and style of the existing roof
- A plumbing vent that matches the size of the pipe that we need to re-flash properly (either a 3n1 plumbing vent or a bullet boot will typically work well)
- Ice and Water Shield
- A box of 1 ¼” roofing hand nails
- A roofing knife with hook blade
- A roofers hatchet
- A caulking gun and tube of caulking to match the color of the roof
Conducting the Repair
Once these materials are gathered, the first thing you are going to want to do is remove the vent and the shingles in the surrounding area that are going to interfere with sliding the new vent in place easily. Be sure to be gentle with how you break the seal on the old shingles so as not to tear the surrounding shingles in the roof field. Considering that the shingles are typically installed in a step wise motion you may need to loosen up a nail in the shingle row above the section you are trying to remove to properly remove the shingles required to conduct the roof repair.
When the area around the base of the pipe vent is clear, cut a square piece of ice and water shield that will go around the base of the pipe. Remove the white protective plastic on the back to expose the self-adhering side and cut an “X” in the ice and water shield to create the perforation through which the pipe will fit. Install the ice and water shield over the pipe with the flap of each “X” riding up on the pipe on each side. For additional protection you may want to add caulking around the base of the pipe between the ice and water shield and the plumbing vent for additional protection, although not completely necessary as there will be other mitigation processes through this process that make that step a bit more than necessary.
Next, build up the shingle rows only to the base of the plumbing vent and cut the back flap of the shingle around the plumbing vent once you get built up to that area. Once the portion of the shingle that will remain exposed is built up to the base of the plumbing vent, fit the vent cover over the pipe and secure it to the roof deck using nails, being sure not to nail too close to the vent so as not to create a penetration near the future water flow area that can potentially leak.
Once the plumbing vent cover is secured, we will continue stalling the shingle rows above the vent, creating a weaving effect of the vent into the roof field. This step can be a little tricky as you will need to cut the two rows above around the arched shape of the back of the vent. To do this, it is often easiest to line up the shingle in the position you want it and cut the shingle around the back of the vent, using the vent itself as the guide for where you will make your cuts. Tie the shingles into the existing roof field by tucking the top row of the repair underneath the bottom row of the roof field. You may need to cut a couple inches off the top of the shingle to fit in properly as it will bump up into the nail line of shingles two rows above since the back pan is longer than the exposed portion of the shingle.
Once everything is installed, apply caulking everywhere the new shingles are tied into the old as well as around the base of the pipe vent cover. Once everything is all sealed up, your pipe vent is repaired and you’re good to go!
Of course if you want to make your life a little easier and avoid this headache, you can always call a trusted roofing company in Austin, Texas like The Roofing Artist and we would be happy to give you a quote on repairing an issue like this or advice on how to mitigate it yourself. Being roofers in Austin is our passion and we’ll be happy to help!
You can reach us by phone at 210-417-7728 or by email at [email protected]